Thursday, October 29, 2026

Super Hexagon Practice Guide: Find the gap and stop overshooting

When a Super Hexagon run ends quickly, distinguish two mistakes: spotting the gap too late and moving past a gap you had already spotted. The first calls for earlier recognition; the second calls for a shorter input. Treating both as slow reactions can make practice frustrating.

This guide suggests a way to practice Terry Cavanagh's action game, whose soundtrack is by Chipzel. It does not depend on a particular controller or survival-time target. Developer's game page, direct listing.

Follow the opening you need next

Focus on the gap in the next approaching barrier. Move toward it, release when aligned, and look for the opening that follows. The rotating pattern can pull your attention around the whole screen; giving yourself one gap to read makes the immediate task clearer.

If you keep watching only the player marker, try looking farther outward. You still need to judge the marker's position, but seeing the approaching wall earlier gives you time to choose a direction. Avoid fixing your gaze rigidly on one point if that makes the next opening harder to see.

Separate late movement from too much movement

After a collision, use the description that best matches what you saw:

ObservationWhat to try
The barrier arrived before you located its openingLook outward earlier
You reached the opening and continued into the wallRelease the direction sooner
Repeated reversals left you between routesChoose a direction earlier, then make a small correction if needed
The collision was too fast to readObserve a few attempts without chasing a record

Short presses are especially useful when overshooting. They are less helpful if you start moving so late that you never reach the gap. Choose the adjustment from the collision you observed.

Keep one setup for a small block of attempts

Practice on the same level with the same controls for a short block. Changing devices after every failure makes the timing harder to learn.

If deliberate left and right presses fail to register consistently, investigate the controls separately. That is a different problem from recognizing an opening. The official Steam listing and direct listing identify their respective editions; use the controls offered by the one you own.

Use the music as support, not as an automatic solution

The soundtrack can help you settle into a run, but the visible barrier still determines where you need to move. If you find yourself pressing to the beat while missing gaps, return your attention to the next opening.

Use a comfortable volume. If rapid motion or flashing becomes unpleasant, stop the session.

Give a short session a concrete finish

Choose one objective, such as releasing the direction sooner. After a few attempts, check whether you are still overshooting the gap or have begun failing somewhere else. That change tells you what to work on next.

A brief note about the recurring collision is enough. If you are restarting without noticing anything new, take a break and return to the same objective later.

Slay the Spire Card Rewards: Choose for the deck you have

At a card reward in the original Slay the Spire, start with the problem your deck needs to solve next. A card that helps in the coming fights can be more useful than one waiting for a combination you have yet to assemble.

Card choices, branching routes and relic interactions all shape a run. This guide focuses on evaluating rewards in the original game; it does not cover Slay the Spire 2. Mega Crit's official description.

Name the problem before reading every possibility

Recall the last few fights. Were enemies surviving too long, were dangerous turns exhausting your defenses, or were expensive cards sitting unused in your hand? Identify the recurring problem before judging the reward.

Be specific. A deck that handles one enemy comfortably but struggles against several has a different gap from a deck that draws too many costly cards together. You can reconsider that diagnosis as the run develops.

Read the complete card text

Check cost, conditions and keywords, as well as the headline damage or block. Inspect an unfamiliar keyword in the game before relying on it.

For a card that needs support, count the support already present. A reward that becomes useful after two further discoveries is a bet on those discoveries. It may be a worthwhile bet, but an immediate weakness makes that delay more costly.

Ask what happens when you draw it on an ordinary turn

Picture the candidate in a fairly ordinary hand from your current deck. Can you afford it alongside the actions you usually need? Does it need another card to be drawn at the same time? Would playing it address the problem you identified?

Synergy can justify a card that does little alone. Check whether the dependency is supported often enough to matter, rather than judging only the best possible combination.

Compare adding the card with leaving the deck alone

Where the reward screen offers Skip, compare that choice too. An addition changes the deck you will draw through.

A simplified example: a 15-card deck contains one particular card. Add a different card and the original now occupies one of 16 positions rather than one of 15. This does not model a full fight, with draw effects and reshuffling; it shows why another card can delay access to an existing one.

There is no fixed deck-size target here. A larger deck can cover problems a smaller one cannot. Ask whether the candidate adds enough value to justify its place.

Check the route and relics before confirming

Review your relics and the approaching route. An existing effect may make the candidate easier to use, while a difficult encounter ahead may make an immediate answer more urgent.

Before confirming, answer these questions:

  1. Which current weakness does this card address?
  2. Is its required support already available?
  3. Can I use it in an ordinary hand?
  4. Do my relics or route change its value?
  5. Would keeping the deck as it is be reasonable?

Review the choice after you use it

If the new card repeatedly stays unused, check why. Cost, missing support and a misread keyword suggest different fixes. One bad draw is not enough to settle the choice, but a repeated pattern can help you evaluate the same reward next time.

Patrick's Parabox Beginner Guide: Track the box and the space inside it

In Patrick's Parabox, track both where a box sits and what its interior contains. Moving the box changes the surrounding arrangement, while entering it brings its internal space into play. Keeping those two views separate makes a confusing transition easier to inspect.

The game lets you push boxes into and out of one another, including recursive arrangements in which a box contains itself. This guide stays with reading those spaces and planning access, without giving individual puzzle solutions. Official Patrick's Parabox page.

Name the space you are working in

Before a move, identify your current space and its container. Simple descriptions such as the small box and the board outside it are enough for an early puzzle.

After a confusing transition, locate the container again. Did you move within its interior, enter a different box or move a box into another space? Identifying that change is more useful than trying to understand every recursive possibility at once.

Predict one transition before making it

Choose a move that crosses a boundary. Identify the destination you expect, make the move, and compare the result. If it surprises you, inspect the relationship between the two spaces before continuing.

For example, when trying to move a box into another container, locate that container's interior and the entry involved. After the move, check where the box appears. This is an observation exercise you can apply to the current puzzle, rather than a solution to a particular level.

Check access before arranging a final position

Before moving a box closer to its intended position, check where you must stand to push it again. A tidy-looking placement may leave the needed side inaccessible.

Then check the containing spaces. The approach may depend on how boxes are arranged outside the area you are concentrating on. Work backward from the next useful push: where must the player be, and what route needs to stay open until then?

Distinguish a blocked route from an incorrect model

When an attempt fails, separate an access problem from a mistaken expectation about the spaces. Repeating the same inputs cannot resolve a transition you have misread.

What you observeWhat to inspect
The transition makes sense, but you cannot reach the needed sideEarlier positioning and the approach route
You reach the boundary, but end up somewhere unexpectedWhich container the interior belongs to
Completing one position makes another inaccessibleThe order in which you arrange the boxes
The same unexplained transition keeps stopping youThat single move, before adding further inputs

An idea can be useful even when its first arrangement fails. The table helps you decide whether to change the route or reconsider the relationship you assumed.

Leave with a rule you can explain

After solving a puzzle, identify the interaction that made it work. Remembering how the spaces relate is easier to reuse than memorizing every direction you pressed.

If you need help, give the puzzle identifier and describe the transition that confuses you. Ask for a hint about that relationship before a full move sequence. The developer's store page provides the broader game overview; the useful question during play is what the current arrangement allows.

Into the Breach Beginner Guide: Read threats before choosing an attack

Before choosing an attack in Into the Breach, inspect what will be hit if you end the turn. Start with threatened buildings and mission objectives, then check your mechs. This gives each action a job before the most tempting target draws your attention away.

Enemy attacks are telegraphed, and civilian buildings supply the power your mechs depend on. Subset Games also warns that your own fire can harm those buildings. The preview therefore matters on both sides of an attack. Official game overview, developer's store description.

Make a short threat list

Inspect the marked attacks and the current mission objective. A threat to a stationary building needs a different response from an attack aimed at a mech that can move away. Check the affected squares and any movement restrictions before deciding which problems need a weapon.

Keep the list concrete: a building on the left, an objective near the center, a mech in an attack line. You can then compare each threat with the units able to reach it.

Plan the turn before spending the easiest action

Look for the threat with the fewest possible answers. Suppose two attacks need attention, but only one mech can reach the first. Reserve that mech for the first threat while checking whether the others can handle the second. This hypothetical example is about assigning actions; it assumes no particular squad or mission.

Preview the entire sequence before committing an easy attack. Using a versatile mech too early can leave a distant threat without an answer, even though the first attack looked efficient on its own.

Compare the outcome with the objective

Read the weapon's full effect. Check damage, any displacement and the attacks that will remain afterward. An action can solve an immediate threat without killing its source, provided the resulting preview shows that the protected target is safe.

Conversely, removing an enemy does little good if the same attack damages a building you needed to protect. Judge the resulting board and mission condition together. After each action, check whether the rest of your planned sequence still works.

Keep collateral damage in the calculation

Follow the effect across every affected square, including where a displaced unit would end up. Read the current weapon text when upgrades or equipment have changed; a remembered value from an earlier run may no longer apply.

If the preview differs from your expectation, resolve that difference before confirming. You may have missed an effect or an occupied square. The turn-based format gives you time to inspect it.

Use a final check before ending the turn

Return to the attacks you identified at the start. Are any still aimed at a protected target? Did moving a unit create a new collision or leave a mission objective exposed? Check the updated board rather than the arrangement you remember planning around.

Learn from one decision after a mission

When a turn goes badly, name the constraint you missed: reach, action order, collateral damage or a mission condition. For example, noticing that you spent the only mech able to reach a far threat gives you a precise check for the next mission. It is a more useful lesson than judging the run by the final result alone.

Downwell Beginner Guide: Read the descent before chasing gems

In Downwell, choose a clear route below you before turning toward a cluster of gems. A reward is easier to judge when you know where you can go after collecting it. Early on, passing up an awkward detour gives you more time to learn the descent.

Your gunboots do two jobs: they attack creatures and slow your fall while firing. Levels are generated anew, with shops, weapon changes and upgrades along the way. That combination makes movement control a useful starting point. Official game page, publisher's description.

Start by learning what a short press does

In an open stretch, watch how a brief burst changes your descent. Then compare it with holding the fire input longer. Keep an eye on the space underneath you: slowing down only helps if you use that time to choose where to go.

Pick an immediate destination, such as the open space below the left side of the screen. Move toward it deliberately. Because the layout changes between runs, learning to identify a destination is more useful than memorizing a sequence of directions.

Read the space before the reward

Before turning toward gems, check the entry and exit. Where will collecting them leave you? Is there room to continue downward, or will you need to reverse direction beside an enemy?

If a cluster lies near a creature you do not yet understand, leave that detour for a later attempt. When you do investigate the creature, try to approach with enough space to see what happens. Several overlapping hazards make a collision much harder to explain.

Treat a weapon pickup as a change in handling

After a weapon change, watch the next few shots. Check the pattern and how it affects the fall before relying on your previous timing. An unfamiliar weapon can disrupt a route even when its attack looks useful.

Notice the adjustment you need: earlier alignment, a shorter burst or more room below. Give the weapon a chance to make sense before deciding that one bad pickup proves it is weak.

Buy for the problem you actually have

At a shop, read the available effects and compare them with the run so far. If you keep arriving with little health, weigh the value of continuing this run against an upgrade that may help later. If a purchase changes an attack, consider whether you understand how to use it in the next stretch.

Use the prices and effects shown in the game. A shopping recommendation from another run may assume upgrades you do not have.

Review one loss, not the whole run

After dying, identify the last decision you could have changed. This quick comparison can help:

What happenedNext-run adjustment
A gem detour left no clear exitLook below the reward before turning
A weapon change disrupted the fallCheck a few shots before attempting a tight route
Several hazards crowded the same spaceChoose a clearer descent when one is available
The collision was too fast to understandLeave the cause open; watch for it on the next attempt

Once you can explain a recurring mistake, practice its correction for a few runs. A repeatable landing or clean exit gives you something useful to build on, even before the score improves.

Dorfromantik Beginner Guide: Compare tile placements before committing

Before placing a tile in Dorfromantik, compare a position that advances a quest with one that leaves a clean boundary. Rotate the tile in both places and inspect the unused edges. That pause can reveal a placement that looks attractive now but leaves an awkward hole later.

In the standard stack-based mode, you draw and place tiles to build a landscape. Completing quests adds tiles; exhausting the stack ends the run. Creative mode offers a different, unrestricted way to build. This guide covers the video game, not the board game. Toukana's official page, developer's description of rules and modes.

Read what the quest actually requests

Check the quest marker before extending a forest, settlement or other feature. A condition that asks for a particular size deserves a different placement from one that permits further growth. Read the displayed requirement instead of assuming that a larger connected area always helps.

For example, Toukana describes a windmill quest involving 6 grain fields and a deer seeking a forest of at least 50 trees. These examples show why the wording matters; use the requirement on your current tile.

When a placement joins two existing groups, inspect the combined result before confirming. A connection can alter more than the small area immediately beside the new tile.

Compare all edges, not just the interesting one

First check whether the position is allowed. Next check its effect on quests, then look around the rest of the tile. A useful forest edge may come with other edges that fit poorly in that location.

Rotate through the plausible orientations. Pay particular attention to small spaces that would become surrounded. A placement that helps one objective can make another feature harder to extend.

Avoid making every future tile solve one exact problem

An enclosed hole has more neighboring edges to satisfy than an open position. Before closing another side of a gap, consider how specific the eventual fit would need to be.

This is a planning preference, not a prediction of the next tile. Completing a quest now may be worth leaving an awkward space. When neither placement offers an immediate benefit, favor the one that leaves more workable edges.

Give each placement one main job

Choose the purpose of the tile in front of you: finish a quest, extend an unfinished feature or improve a fit. Then compare a few promising positions against that purpose.

SituationPlacement check
A quest is nearly completeWill the displayed condition actually be met?
Several positions fitWhich rotation leaves fewer awkward edges?
A hole is nearly enclosedHow many different features must its final tile match?
You want to build without managing the stackConsider creative mode

You can enjoy the landscape without proving that every tile has gone in the single best spot.

Review the map when the stack runs out

Look for a repeated pattern: many unfinished quests, enclosed holes or large features you kept growing without checking their conditions. Choose one pattern to change on the next run. The finished map makes these choices visible, so there is no need to reconstruct every move.

Baba Is You Beginner Guide: Read the rules before pushing blocks

When you are stuck in Baba Is You, reread the rules assembled on the board. An object that looks like a wall or a goal can invite assumptions that the current rules do not support.

The rule blocks are physical objects. Moving them can change how objects behave and what you need to do to win. That is the central mechanic of the game. Hempuli's official page, developer's description.

Separate what you see from what you assume

Identify the active rules, then describe the obstacle stopping you. A blocked-looking path is a layout observation. The belief that its objects must always block movement is something to check against the rules.

Try describing the difficulty precisely: you need to reach a word from its left side, or you need an object to behave differently. This gives you a smaller question than how to solve the entire level.

Read the whole board after a change

After moving a word, check which sentences remain intact. A push can create the rule you wanted while breaking another rule you were relying on.

If an object behaves unexpectedly, pause there. Look for the active rule that explains the result before making several more moves. An object's familiar appearance is less useful than the properties the current sentences assign to it.

Test one hypothesis at a time

Choose a rule you think is causing the obstacle and inspect which of its words you can move. Predict what would change if you interrupted or rearranged that sentence, then test the idea.

Keep the test small enough to explain. If you change several sentences together, it becomes harder to tell which one produced the result. When the behavior differs from your prediction, check for another active rule interacting with the one you changed.

Think about access as well as meaning

A useful sentence still has to be assembled on the board. Before pushing a word, check where you will need to stand for its next move. A word can be closer to the intended sentence but harder to reach from the necessary side.

This is particularly worth checking near an edge or in a crowded area. Some solutions need restrictive arrangements; the question is whether you can still make the remaining pushes after creating one.

When stuck, change the question

If every attempt follows the same route toward an apparent goal, inspect the rule that makes it a goal. Changing the objective may be part of the puzzle.

Work through these questions:

  1. Which active rule creates the obstacle?
  2. Which words can I reposition?
  3. What useful sentence could they form?
  4. Where would I need to stand to form it?
  5. Which assumption about winning have I left unchecked?

These checks keep the focus on the current board without revealing a named level's solution.

Ask for a hint that preserves the part you enjoy

When seeking help, give the exact level name and explain the rule interaction you understand so far. Ask for one assumption to reconsider before requesting a move sequence. Try that hint on the board first; you may need much less help than a full walkthrough provides.

A Monster's Expedition Beginner Guide: Plan the path before pushing a tree

Before pushing a tree in A Monster's Expedition, inspect where you want the resulting path to lead and where the monster must stand to create it. A log close to the shore is only useful if you can still approach it from the side needed for the next push.

Draknek & Friends describes an open-world puzzle game in which trees form pathways between islands. The exhibits tell a playful version of human history through monsters' eyes. This guide keeps individual island solutions and discoveries intact. Official site, developer's game description.

Inspect the island before the first push

Locate the tree, the walking space around it and the relevant shore. Pick a possible destination, then check the sides from which you can approach the tree.

The closest visible island may suggest a route, but it does not establish that the route works from your current position. Let the available space guide the first attempt. Notice whether an early push would leave the monster stranded on the wrong side of the wood.

Observe what one push changes

After a push, inspect the log's position, orientation and remaining approaches. If the result differs from what you expected, stop there long enough to understand the difference.

Use the undo or restart control shown in your edition when you want to revisit a move. A small experiment is easier to learn from than a long chain of pushes followed by an unfamiliar arrangement.

Work backward from a useful final approach

Imagine the last push that would place the log where you want it. Where must the log be immediately beforehand? Where must the monster stand?

Compare both positions with the island's walking space. If the standing position is inaccessible, look for an earlier arrangement that preserves access or reconsider the route. Moving the log progressively closer to the shore will not help if the required final approach remains blocked.

Keep a failed route specific

Identify the first move that removed access you still needed. That is a better place to reconsider the plan than the final arrangement where the problem became obvious.

ObservationQuestion for the next attempt
The log reaches the intended area, but its useful side is inaccessibleWhich earlier position would preserve that approach?
The path points somewhere unhelpfulWas the destination assumption right?
A push produces an unexpected movementCan I inspect that interaction on its own?
Every attempt recreates the same blocked arrangementWhich earlier move am I repeating without reconsidering?

Let exploration help when you are stuck

If another direction is accessible, explore it and return later. The open-world structure gives you room to pursue other islands when the current route has stopped making sense.

Remember the specific issue you were investigating before leaving. A note about needing access to the far side of a log can save you from repeating the same failed sequence next time. The exhibits also offer a welcome pause from planning each push.

Choose hints that preserve the discovery

For outside help, identify the island with a screenshot or a precise description. Explain the arrangement you tried and the approach that became blocked. Ask for a small hint about that constraint before requesting a full sequence; it keeps more of the solution yours to discover.

Tuesday, October 27, 2026

VVVVVV Beginner Guide: Gravity Flips, Checkpoints and Practice

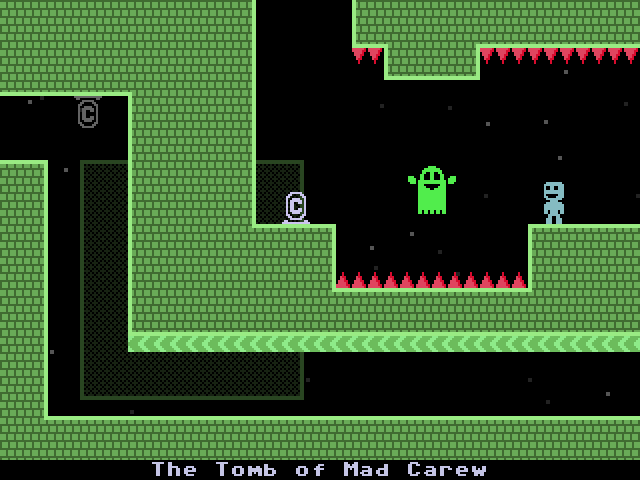
Captain Viridian faces spikes and checkpoints in The Tomb of Mad Carew

VVVVVV replaces a conventional jump with a gravity flip. For a first run, read the route to the next safe surface, make one attempt, and change one decision after a failure. The frequent checkpoints described by the developer make this a useful game for short, focused practice.

Your job as Captain Viridian is to find the separated crew. The official description emphasizes challenges built around a simple movement idea, without collecting power-ups to open the next route. A difficult room is therefore a reason to examine the movement problem before looking for an upgrade.

1. Identify the next landing surface

Before moving, look at the surface you intend to reach and the hazards between you and it. Think through the change in gravity rather than importing the timing of a platform game with an ordinary jump. Read the controls shown in your version; this guide does not assume a particular keyboard binding.

I would practice the opening movement of a room until I could explain why it worked. I would move on sooner if repeated attempts were becoming rushed. A short break is more useful than adding another ten attempts with no change in approach.

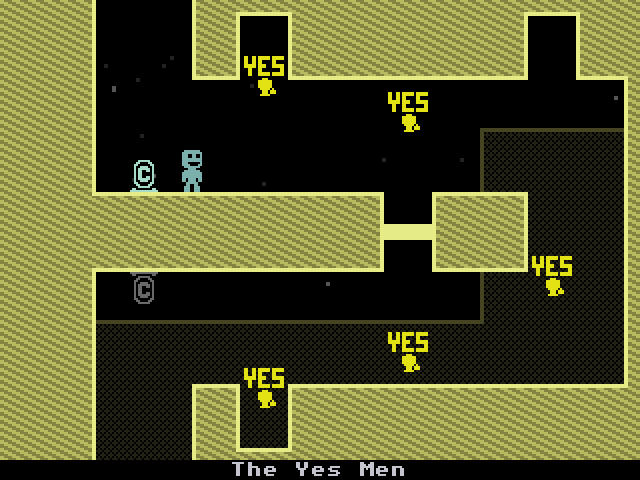
The Yes Men room shows a checkpoint beside the starting area
The Yes Men room shows a checkpoint beside the starting area. Terry Cavanagh - http://thelettervsixtim.es/ — unmodified screenshots, CC BY-SA 3.0. Creator · License.

2. Change one thing between attempts

A room-by-room practice log
What happened?Next experimentWhat to observe
You met a hazard earlyReconsider the starting positionWhether the route begins with enough clearance
You reached the right area but missed the surfaceAdjust horizontal movementWhether you arrive over the intended space
A moving obstacle crossed the routeWatch a cycle before startingThe gap available for your movement
You repeat different mistakes each timeReduce the attempt to the first movementWhether that section becomes predictable
You understand the route but feel rushedTake a break and returnWhether you can describe the plan before acting

These are suggested experiments, not fixed solutions to named rooms. The point is to know which change you are testing. Changing your start, direction and timing together makes it difficult to identify what helped.

3. Let checkpoints define a small practice task

  1. Notice where the current attempt begins.
  2. Choose the next manageable stretch to understand.
  3. Make an attempt with one specific movement plan.
  4. After failure, identify the first thing that departed from the plan.
  5. Change that decision and try again when ready.

Do not turn the death count into a verdict on your ability. The useful result is learning how the route behaves. At the same time, repeated failure without a new observation is a good reason to stop and examine the room more slowly.

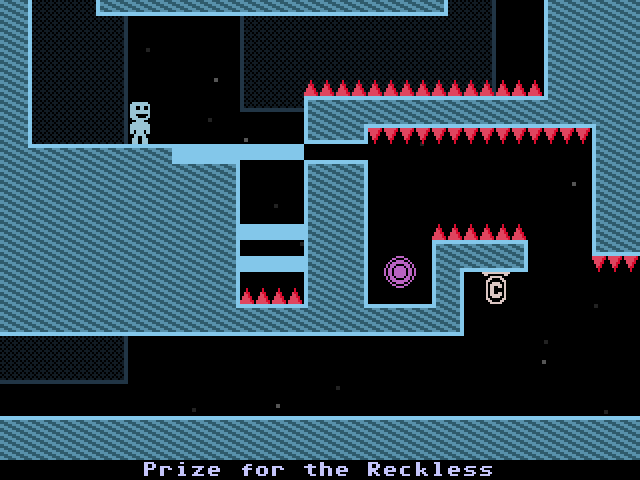
Prize for the Reckless separates a trinket from the checkpoint
Prize for the Reckless separates a trinket from the checkpoint. Terry Cavanagh - http://thelettervsixtim.es/ — unmodified screenshots, CC BY-SA 3.0. Creator · License.

4. Keep optional goals separate from finishing a route

The game includes additional modes such as time trials and a no-death mode. Those are different goals from learning the main game. Decide what today’s session is for before comparing your performance with a speedrun or a specialized challenge.

For an invented practice session, you might spend five minutes understanding one room and end by writing a single reminder: “Watch the obstacle first; then choose the starting position.” This example is a planning suggestion, not a claimed completion time or a guarantee that the room will take five minutes.

When to finish the session

Stop after a useful observation, not only after a successful attempt. Note the room and the movement you want to revisit. On the next session, test that note against the game rather than assuming you remember the whole sequence.

Check the current official store listing for platform and language support before buying. Custom levels and challenge modes can impose different demands; the checkpoint advice here concerns learning the standard game and is not a promise about every community-made level.

Sources and related reading

Official developer/publisher store listing and screenshots. Game facts checked October 27, 2026. Practical note-taking and practice suggestions above are editorial recommendations.

Related: Marching Order Beginner Guide: Solve Animal Band Logic Puzzles.

Screenshot source: official press materials or licensed image record.

Images by Terry Cavanagh - http://thelettervsixtim.es/, CC BY-SA 3.0, unmodified.

Terry Cavanagh - http://thelettervsixtim.es/ — unmodified screenshots, CC BY-SA 3.0.

Monday, October 26, 2026

Clash of Clans: How to Choose a Base Layout for Your Town Hall

A useful Clash of Clans base search starts with a job: organise upgrades, protect resources, or prepare a defensive layout. Decide which job matters before copying a design. An open progress base can make buildings easy to inspect while leaving them exposed.

Home Village in the official Clash of Clans interface guide

I would compare two layouts for the same job and Town Hall. Comparing a decorative progress base with a war layout tells you very little about which defensive arrangement to practise with.

Choose the purpose first

Your taskLook forCheck before using it
Organise constructionA clearly labelled progress layoutDo not mistake an open display arrangement for a defensive recommendation.
Review resource placementA farming layout with readable storage positionsInspect exposed storage groups and likely approaches.
Prepare for defensive practiceA war or defense layout for your Town HallInspect compartments, building placement and traps in game.

Read the preview before copying

We also run Clash Insight's base layout collection. It includes previews, copy links and notes on visible strengths and weaknesses. Those notes describe the saved arrangement; they are not battle-tested win rates.

For example, the Town Hall 12 collection separates war, farming, defense and progress layouts. Use the section matching your own Town Hall. Pick one design and identify an exposed area you want to inspect after importing it.

Check the imported layout in game

Build button in the official Clash of Clans interface guide
Official Supercell interface screenshot. Source and explanation. Open the image for a larger view.

Supercell's October interface guide places Build at the bottom right. Open Build and find the layout editor there. Keep your existing arrangement available before trying a new one.

  1. Open the selected layout's copy link on a device with Clash of Clans.
  2. Inspect the destination and imported result before making it active.
  3. Check that the buildings and walls you have are placed as intended. Review traps and any incomplete or unavailable placement in the game itself.
  4. Confirm that the layout is appropriate for the village and purpose you selected.

A public player lookup cannot reconstruct your full village layout or verify every building placement. The game is where you confirm that the imported design actually fits.

Use the replay to choose the next change

Battle menu with army and battle log access
Official Supercell interface screenshot. Source and explanation. Open the image for a larger view.

Practice example: two resource storages are reached from the same edge in a defense replay. Mark the route and the first opening. Inspect whether the layout deliberately groups those storages, and whether another compartment arrangement would address that particular route. One replay does not prove a base is weak against every army.

Record the attacking army and the entry side before changing anything. If the next attack uses a different army or much stronger levels, treat it as a different test. Avoid judging the layout from a single trophy or star result.

For clan-war planning, our war roster checklist covers a separate decision: who is available and ready to use their attacks. A copied base cannot answer that question.

This material is unofficial and is not endorsed by Supercell. Screenshots: Supercell, used under its Fan Content Policy.

Sunday, October 25, 2026

Marching Order Beginner Guide: Solve Animal Band Logic Puzzles

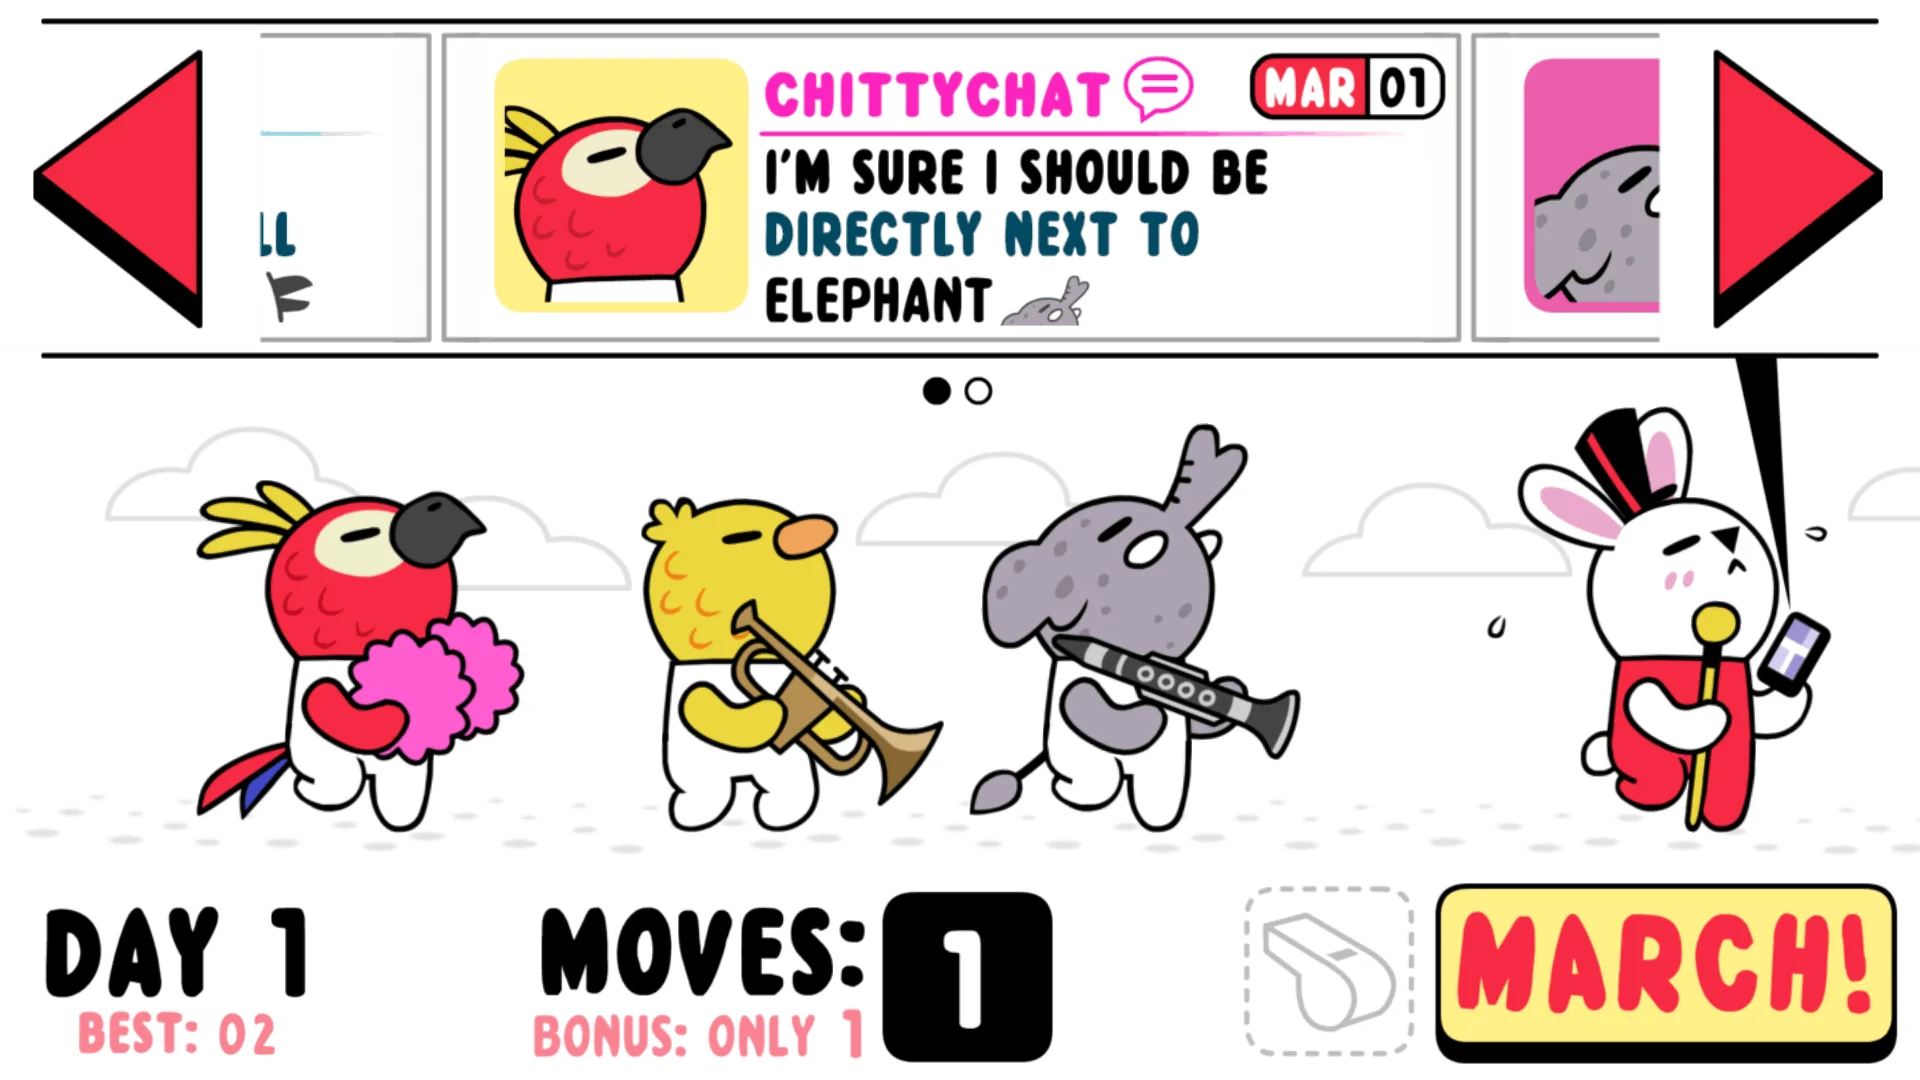
Animal marching band and adjacency clue in Marching Order

Marching Order asks you to arrange an animal band so that every member’s condition is satisfied. The useful first move is to read all the clues. An animal that appears easy to place may also be needed beside another member, so solving each clue in isolation can create an order that fails overall.

SFB Games’ official press page describes a logic puzzle in which the band’s preferences appear as social-media-style messages. Read the conditions, rearrange the animals and attempt to march. More animals and clues join as you progress, and hard mode adds a timer.

Distinguish position, order and adjacency

I recommend translating each clue into a short relationship before dragging anyone. “At the front” fixes a position. “Behind” describes an order. “Directly next to” requires neighbouring positions. Those are different constraints, even when they mention the same two animals.

Check the exact wording on your screen. Do not silently turn “behind” into “immediately behind,” or treat a condition about an instrument as a condition about the animal holding it. The game’s clues can refer to different properties.

Illustrative clue typeWhat it restrictsCommon misreading
A must be firstOne exact positionPlacing A merely near the front
B must be directly beside CTwo neighbouring positionsLeaving another member between them
D must come after ERelative orderAssuming they must be neighbours
F needs qualifying neighbours on both sidesPosition and neighbour propertiesChecking only one side

These lettered examples explain logic relationships; they are not a fixed solution to one of the game’s generated puzzles.

Place the strongest restrictions first

Begin with a clue that leaves the fewest possibilities. A fixed end position is usually easier to use than a broad ordering condition. Then inspect relationships involving that member. If another animal must stand beside it, the end position may narrow the neighbour’s location immediately.

A worked practice example: suppose A must be first, B must be directly beside A and C must come after B. With three members, A–B–C satisfies all three statements. With a fourth member, the same clues might leave more than one arrangement. Do not assume you have a unique answer until you check the remaining conditions.

Check properties as carefully as names

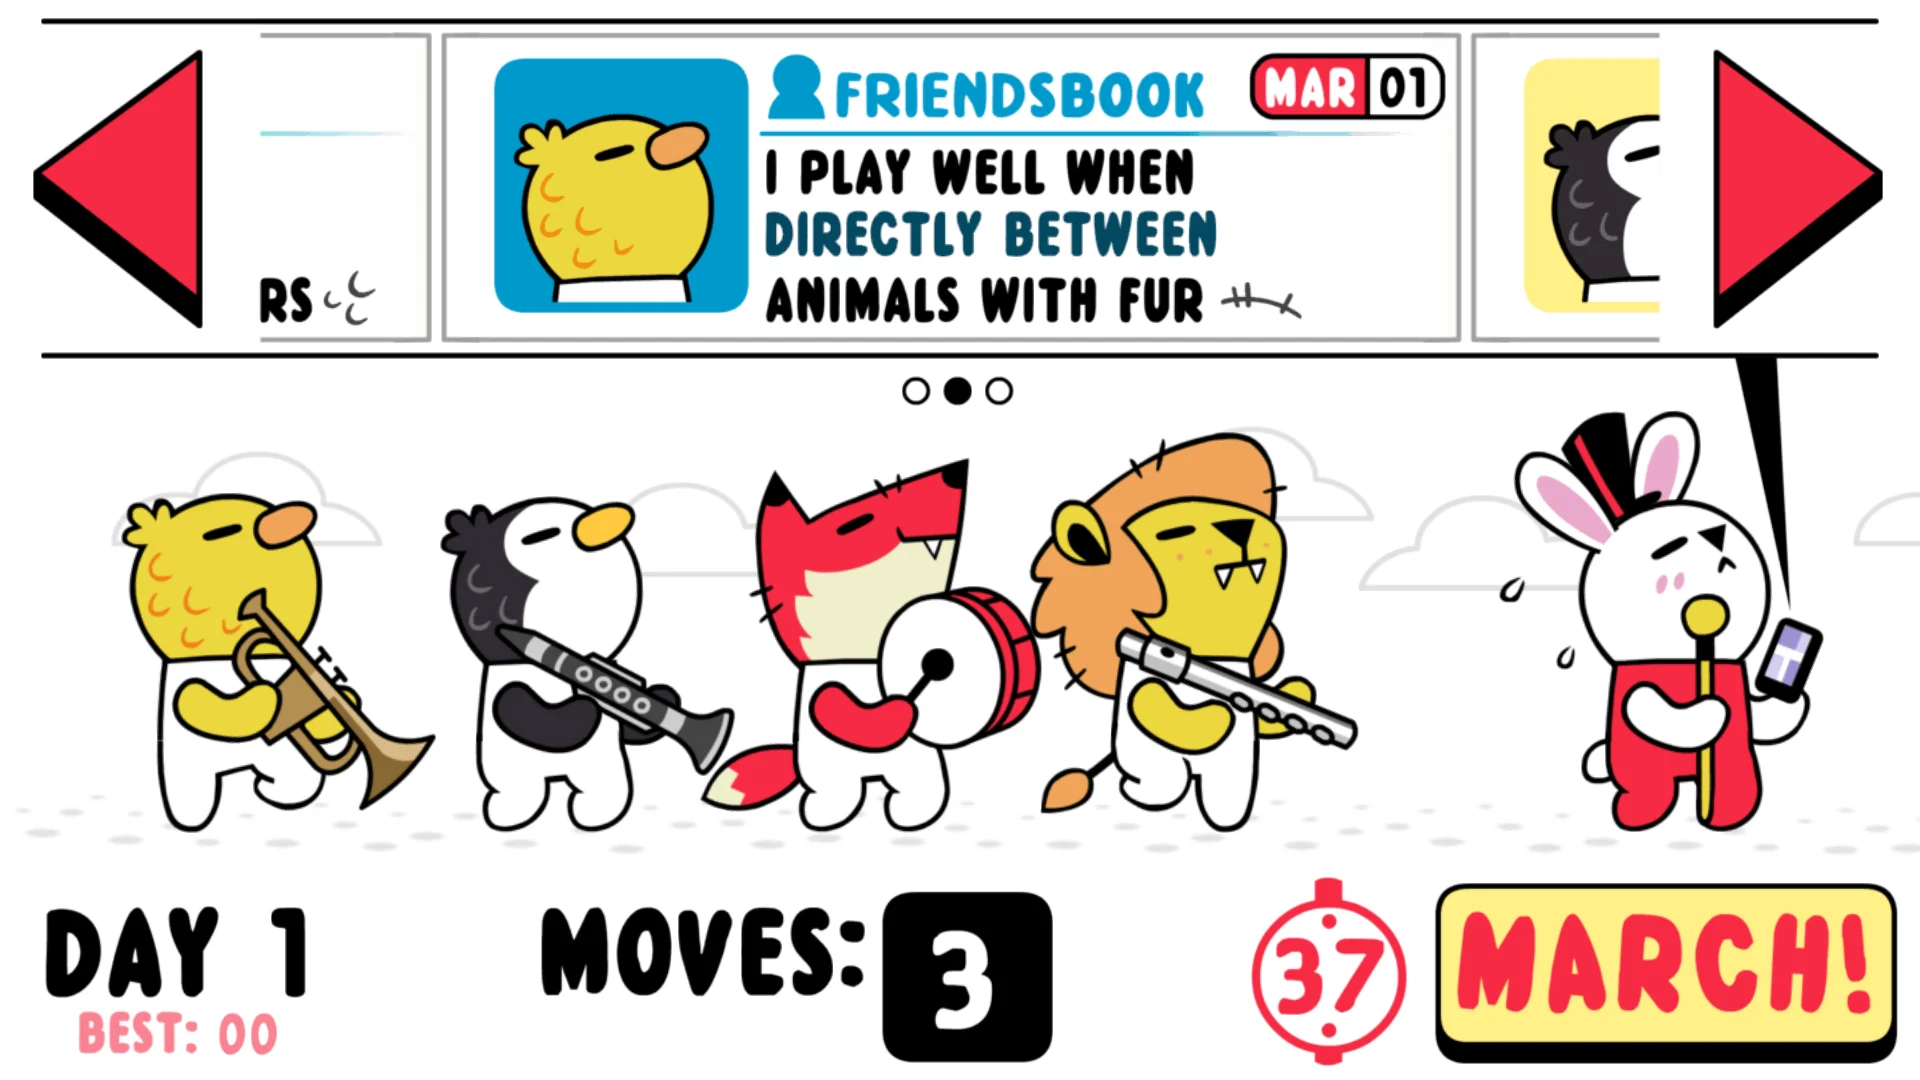
Marching Order hard mode shows an animal requesting neighbours with fur
A clue can concern a shared property rather than a specific named animal. Read both sides of the requested relationship. Official developer press screenshot. Tap to enlarge.

When a clue concerns fur, an instrument or another visible property, identify every member that qualifies before moving anyone. A convenient candidate may already be committed by a stronger condition. Keeping the possible candidates in mind helps you avoid undoing a placement repeatedly.

I would delay hard mode until these translations feel familiar. If reading the clue is still the slowest part, the timer may encourage guesses before you have understood the relationship. Once you can interpret the conditions consistently, timed play becomes a useful extra challenge.

Audit the complete line before marching

  1. Read the first clue and check it against the current arrangement.
  2. Continue through every remaining clue without moving anyone yet.
  3. Identify the specific conditions that fail.
  4. Make a change intended to fix those failures.
  5. Recheck the clues affected by the move, then scan the complete set again.

A move can satisfy one animal while breaking a condition that was previously correct. That is why the final scan matters. The arrangement is ready when all the conditions agree with it, not when the last animal you moved appears happy.

Use a failed march to find a misread condition

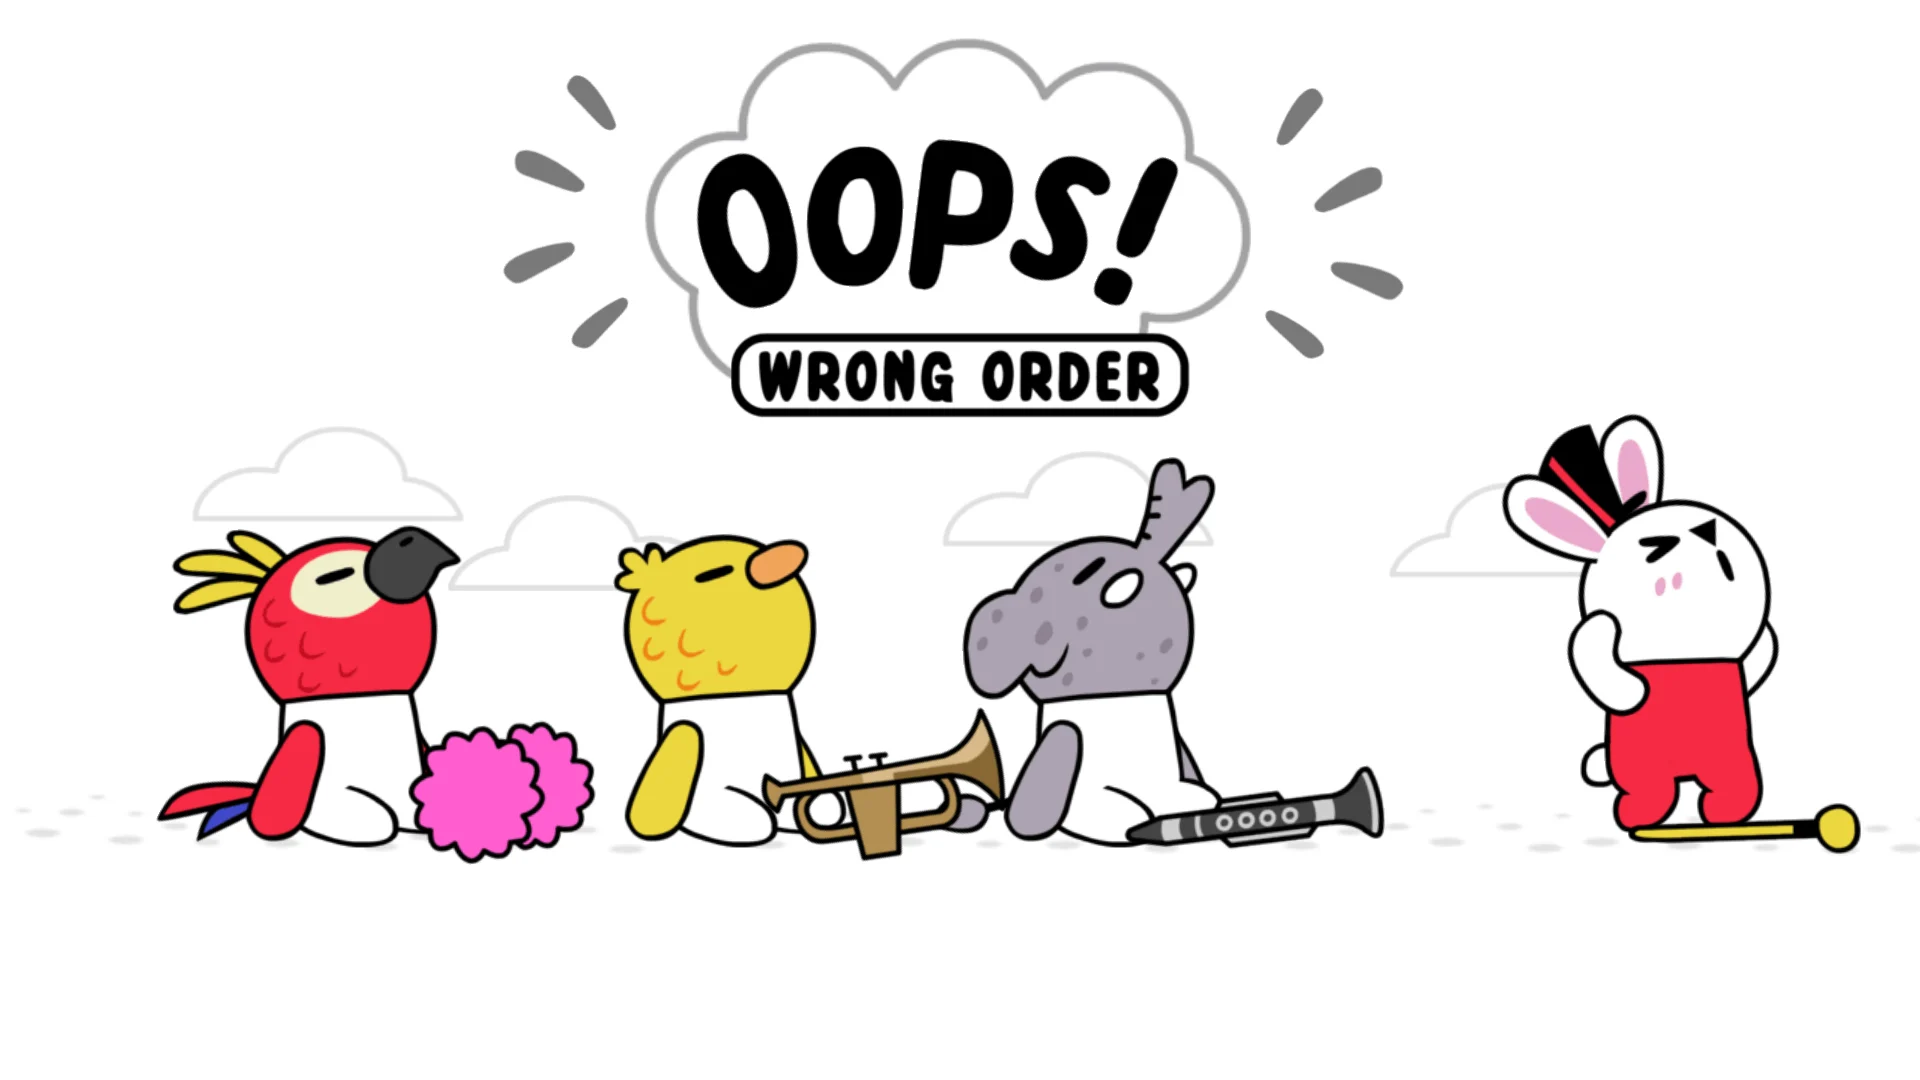
Marching Order displays Oops Wrong Order with the band stopped
A failed attempt is a reason to review the exact clue wording and the complete arrangement. Official developer press screenshot. Tap to enlarge.

After a failure, look for a specific misunderstanding before shuffling randomly. Did you reverse the order, overlook “directly,” or miss a property shared by several animals? If you can identify the error, your next attempt has a clear purpose.

For short practice sessions, keep one rule in focus: for example, read every adjacency condition twice before marching. Review whether that habit prevented the error you were making. There is little value in recording a long list of failed arrangements if you never identify the clue that ruled them out.

Our Dicey Dungeons beginner guide discusses another game where restrictive conditions deserve attention before flexible choices. For Marching Order, follow the developer’s store links to check current availability for your device; historical press prices are not a current purchase quote.

Official promotional screenshot. Copyright remains with the developer.

Saturday, October 24, 2026

Haunt the House: Terrortown Beginner Guide: Possess Objects and Scare People

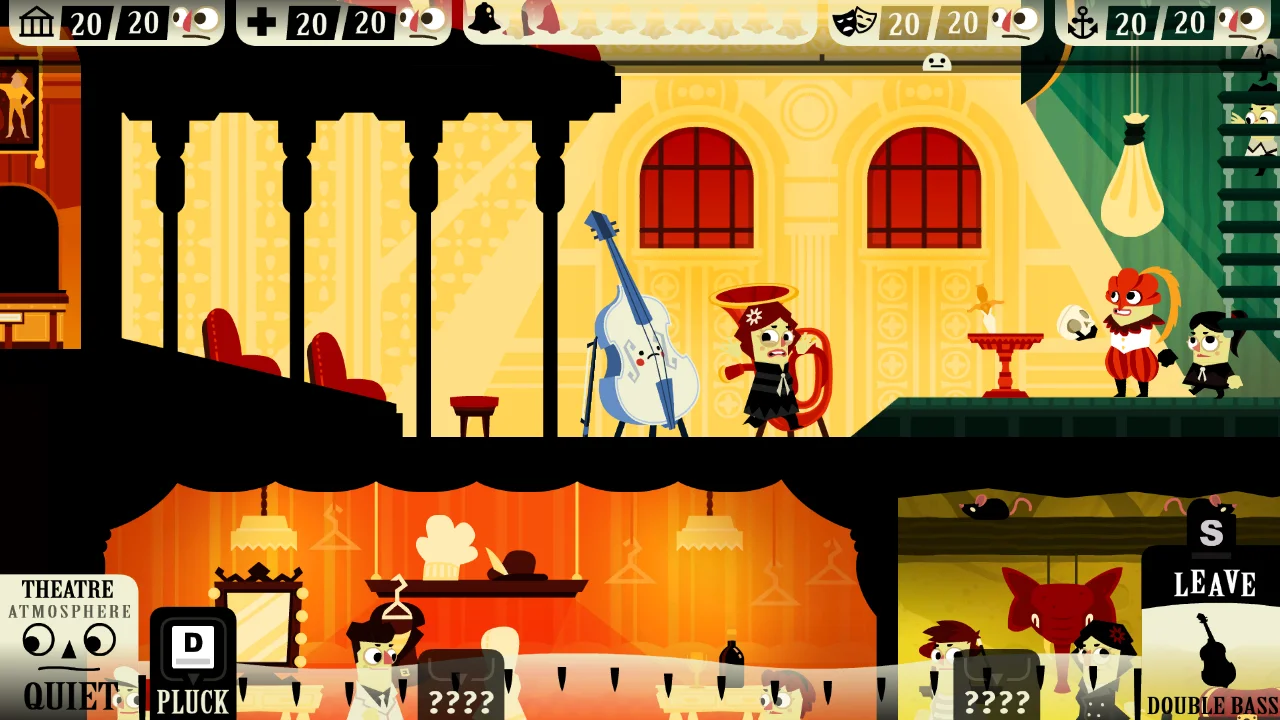
Theatre cutaway with ghost and audience in Haunt the House Terrortown

In Haunt the House: Terrortown, possessing an object is only the start of a useful scare. Watch the people nearby and see what the action changes. Repeating a dramatic effect while everyone is elsewhere gives you less information than trying one action beside a person and following their response.

SFB Games’ official introduction describes a ghost who possesses objects to frighten people out of town. The locations contain many objects with different powers. This beginner guide focuses on learning those interactions without revealing secret objectives.

Learn one room before touring the whole building

I recommend starting with a small group of objects near people you can easily follow. Try a power, leave time to observe the response and compare it with another object. If you prefer discovering visual jokes, explore more freely; the game’s animations are part of its appeal.

For deliberate progress, however, moving through every room immediately can make the building feel less predictable. You may know that several objects animate without knowing which people noticed them or where those people went.

Read the crowd after each scare

Look at the person’s reaction and direction of movement. Did they remain nearby, move to another part of the room or leave your immediate view? These observations are more useful than judging a power only by how large its animation looks.

SituationA useful next actionWhat to observe
No person is close to the objectMove to an occupied area or wait for someone to approachWhether anyone actually responds
A person reacts but stays nearbyPause and watch before repeatingThe direction and duration of their response
People move into another roomFollow their movement before choosing another objectWhere the group has gathered
You are unsure which effect helpedTry one effect at a timeThe response associated with that action

Use the building as a map

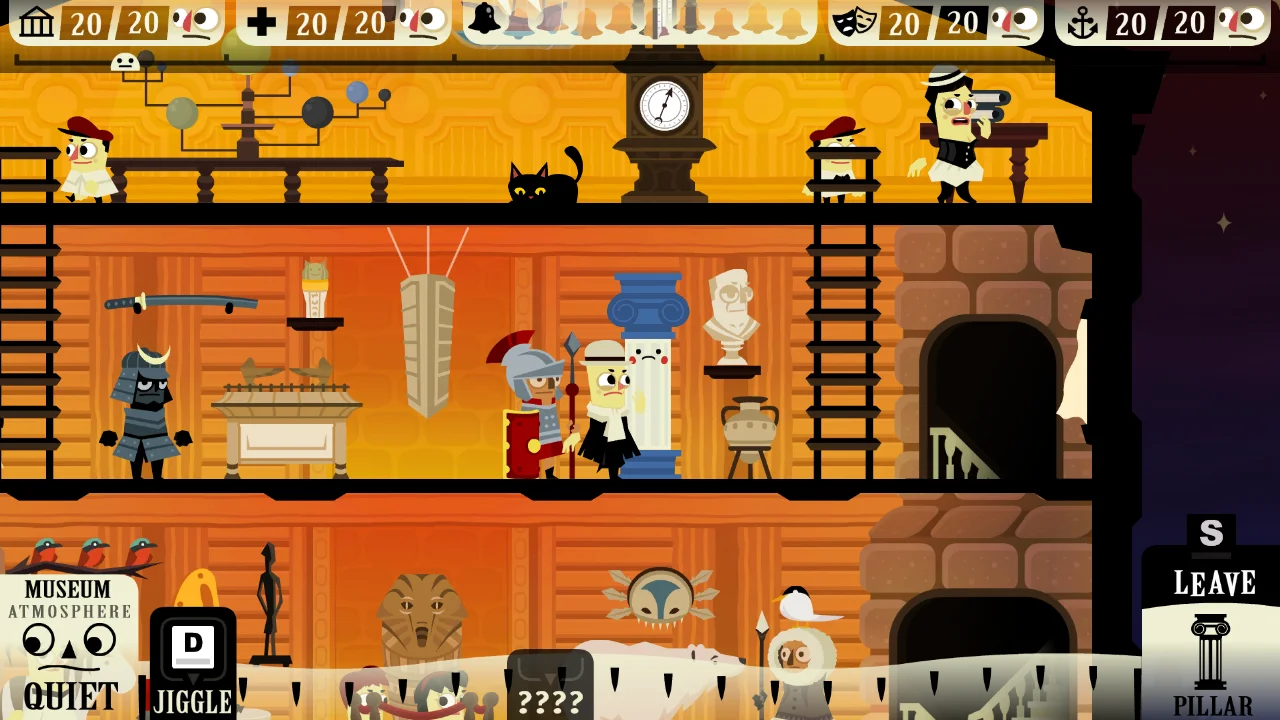
Museum rooms with display cases and a dinosaur skeleton in Haunt the House Terrortown
The cutaway view lets you compare occupied rooms and nearby objects before moving the ghost. Official developer press screenshot. Tap to enlarge.

Before possessing something, locate the people you want to affect and note how the rooms connect. You do not need a detailed floor plan. A simple understanding of the neighbouring spaces makes it easier to follow what happens after an interaction.

When someone disappears from the room you were watching, check the adjacent spaces before assuming they have left the building. A change of room and a successful departure are different observations. Use the game’s own progress information to confirm the broader result.

Make a short experiment

  1. Choose one occupied room with a few accessible objects.
  2. Possess an object and read the available controls or powers.
  3. Use one action when a person is nearby.
  4. Watch their response before switching objects.
  5. Try another action only after you can describe what the first one did.
  6. Check the game’s progress information before declaring the room finished.

This is a learning routine rather than a guaranteed solution. It helps you connect an action with a visible result. Once the objects are familiar, you can move more quickly and combine what you have learned.

A bigger reaction is not always the right goal

The official description cautions against frightening people too much. That is a reason to watch outcomes rather than treating maximum panic as an automatic success. If you are trying to clear the location, keep that objective in view while experimenting.

I would avoid rapid repeated inputs when I no longer understand what the crowd is doing. Pause, find the people again and choose the next object for its position as well as its effect. If you are simply exploring the animations, repetition may be enjoyable, but it tells you less about cause and effect.

Expect a new setting to need a fresh look

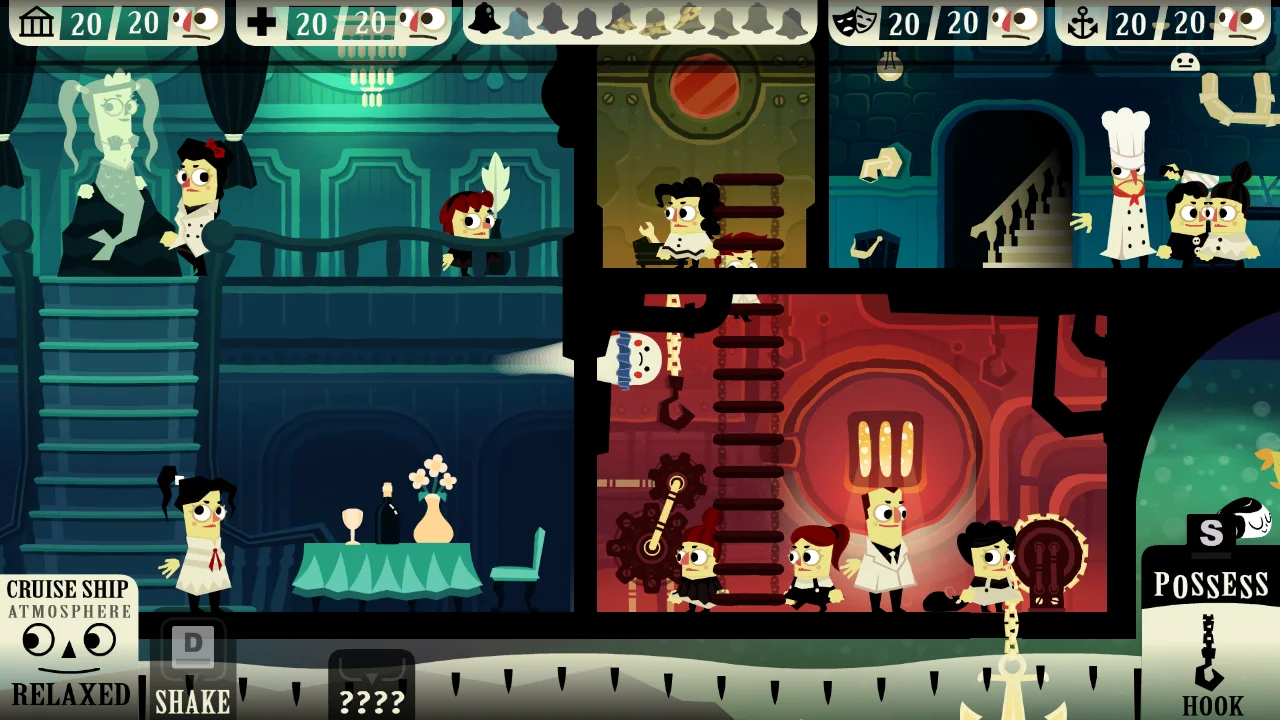
A ship shown in cross section with dining rooms and passengers in Haunt the House Terrortown
A different setting changes the arrangement of people and objects. Inspect the layout rather than assuming a previous room strategy transfers exactly. Official developer press screenshot. Tap to enlarge.

The press kit lists multiple locations and a large selection of possessable objects. Learn each location from what you can actually see. A familiar-looking prop may sit in a very different place relative to the people and the rooms around it.

Keep a mental note of one useful observation from a session: an object that drew a response, a room where people gathered or an action you used without understanding the result. That is enough to give the next attempt a purpose.

For another game where observing movement matters, our Mini Motorways traffic guide explains how to identify a specific problem before changing a layout. Haunt the House screenshots here come from SFB’s official press kit. Consult the developer’s current store links before buying; the historical press page also lists older platforms.

Official promotional screenshot. Copyright remains with the developer.

Friday, October 23, 2026

Dicey Dungeons Beginner Guide: Plan Dice and Choose Equipment

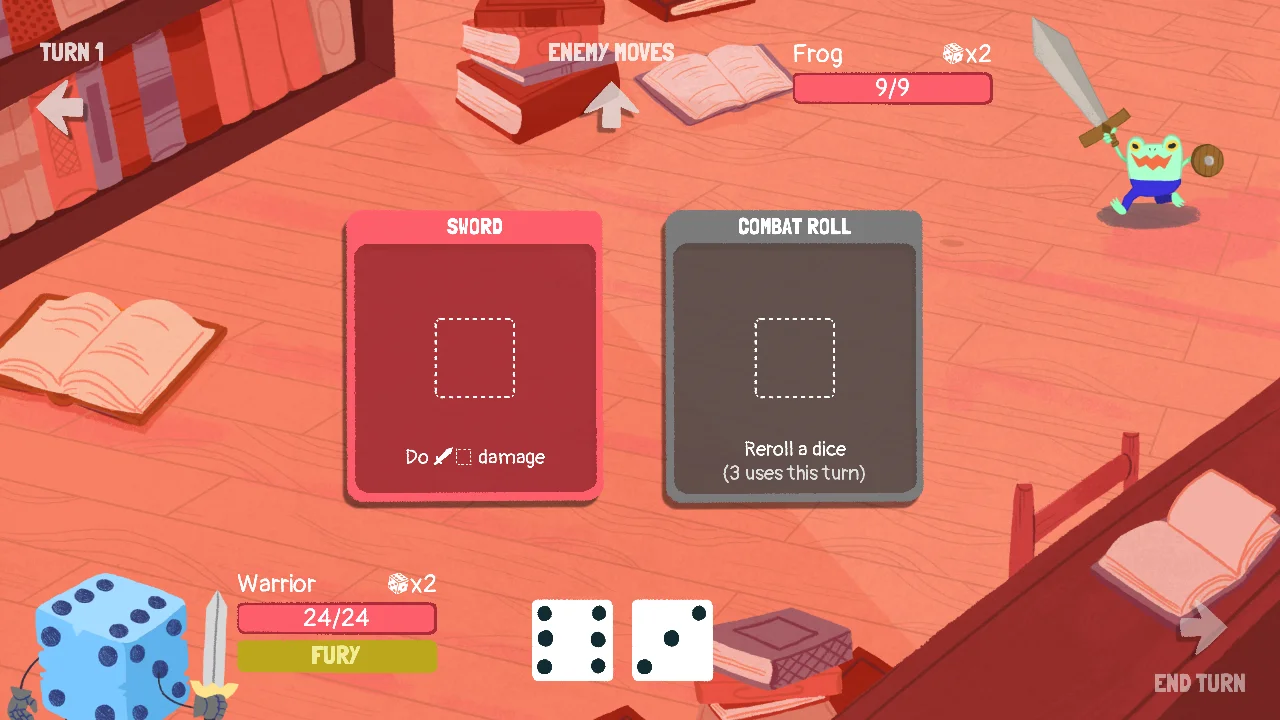
Warrior battles a frog with dice and equipment visible in Dicey Dungeons

Before placing your first die in Dicey Dungeons, read every usable piece of equipment. A die that fits an unrestricted attack may also be the only die that satisfies a more demanding slot. Plan the turn before spending the roll.

The official press kit describes a game built around equipment, changing dice rolls and characters with distinct rules. This beginner guide focuses on reading those rules and allocating a turn. Exact equipment values and episode conditions should always come from your current screen.

Reserve the awkward die first

I recommend identifying the most restrictive useful action before using a die on something flexible. Read whether a slot asks for a particular value, a limit or another condition. Then compare the dice you actually rolled.

For an invented example, imagine one useful item accepts only a three, while another accepts any die. If you rolled a three and a five, spending the three on the flexible item may remove an option you wanted. This is a simple allocation exercise, not a claim about a named item’s current balance.

Equipment questionWhy it mattersDecision to make
Which dice are accepted?A restrictive slot can compete for a unique dieReserve its input if the effect is valuable
What does the effect actually do?Damage, defence and dice manipulation solve different problemsChoose the result needed this turn
Can it be used again?One use and repeated use create different plansRead the card before allocating extra dice
Does another item depend on it?Order can change your available optionsResolve the enabling action first
Will the enemy survive?Defence can matter when another turn is likelyCompare immediate damage with the expected response

Read a shop as a change to your loadout

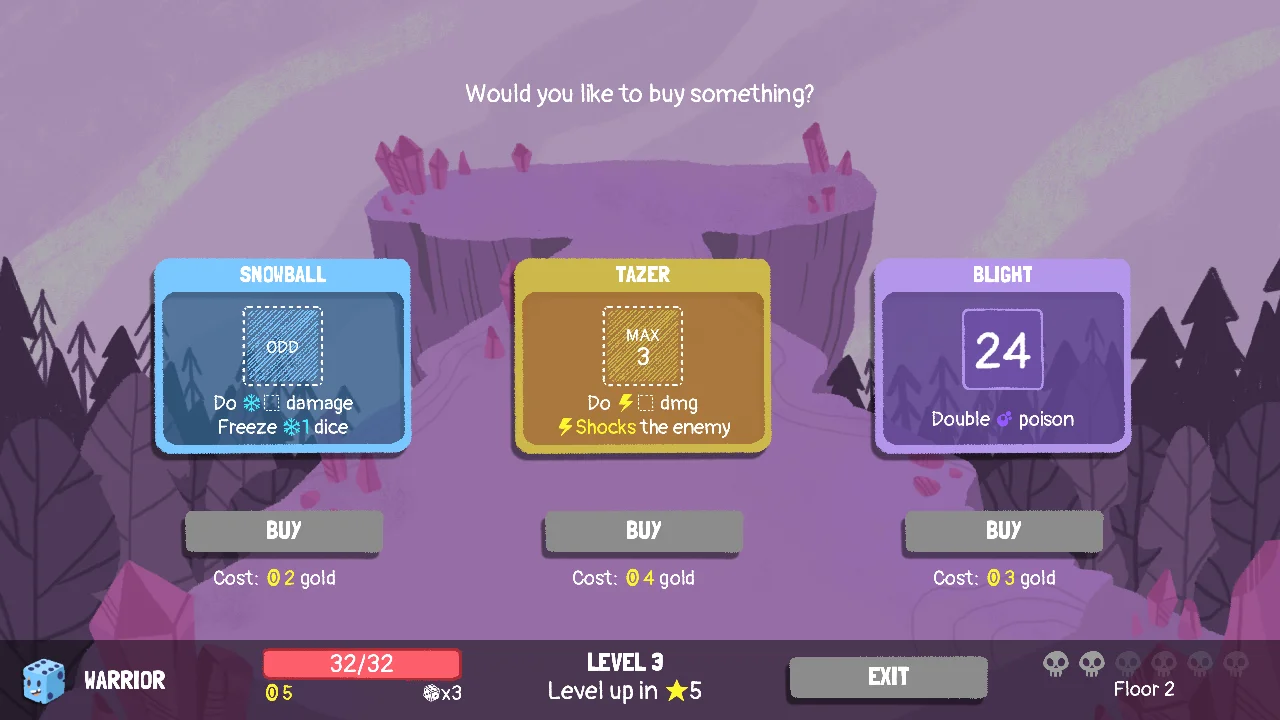
Dicey Dungeons shop displaying equipment choices for the Warrior
Compare an offer with the equipment you already use. These promotional prices and values may differ from your version. Official developer press screenshot. Tap to enlarge.

Before buying, name the problem the item solves. Does your current equipment leave particular rolls unusable? Do two items need the same input? Would the purchase replace a piece you rely on, or does it support a plan you already understand?

A powerful-looking effect can be awkward if your other equipment consumes the dice it needs. Conversely, a modest effect can be useful when it gives purpose to rolls you regularly waste. Judge the combination rather than reading each card in isolation.

Use a short turn-planning checklist

  1. Read the enemy information and your current equipment conditions.
  2. Find the useful actions with the fewest acceptable inputs.
  3. Check whether a dice-changing effect should happen before another action.
  4. Allocate the remaining dice to flexible effects.
  5. Review any unused dice and the likely enemy response before ending the turn.

You will not always have a perfect sequence. The purpose is to make a deliberate trade-off, so you can understand afterward whether the result came from the roll or from how you used it.

Keep character rules separate

The official introduction describes very different systems for characters such as the Robot and Witch. A trick you learned with one character may depend on a rule another character does not share. Read the current character and episode information when starting a new run.

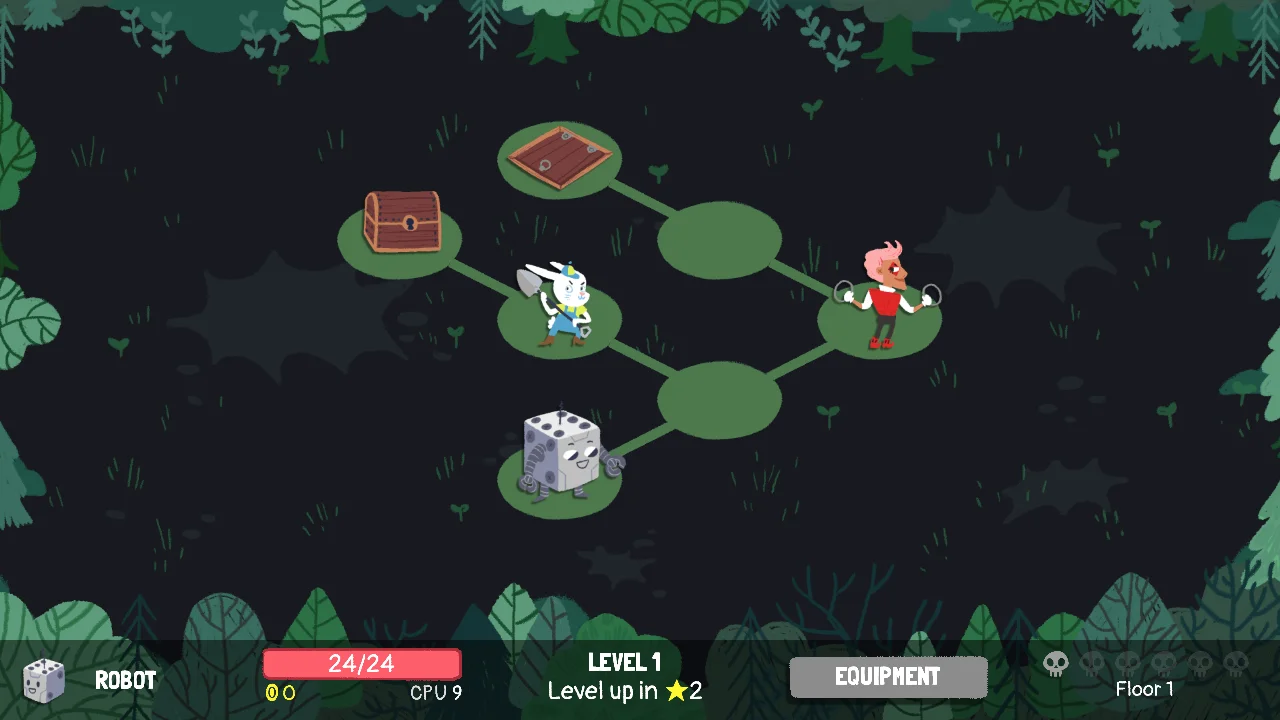
The Robot stands on a branching Dicey Dungeons floor map
Review the available encounters and rewards on the current floor. The character and episode rules affect the plan. Official developer press screenshot. Tap to enlarge.

I would learn one character’s first available setup well enough to explain a few turns before treating advice for every character as interchangeable. If experimentation is what you enjoy, switch freely, but give each new ruleset a fresh reading.

Review one decision after a fight

Ask whether you spent a scarce die too early, overlooked a condition or bought equipment without a clear role. Choose one observation to use in the next encounter. “The roll was bad” may be true, but it does not reveal whether another allocation was available.

For a practice review, write the dice values and two possible orders before committing. Compare what each order leaves unused. You can do this mentally once the equipment is familiar; there is no need to turn every fight into a spreadsheet.

Our Brotato shop guide offers another way to judge purchases by their role in a build. Dicey Dungeons screenshots are supplied through the developer’s press kit. Use the official game website for current platform and purchase links.

Official promotional screenshot. Copyright remains with the developer.

Thursday, October 22, 2026

Mini Motorways Beginner Guide: Fix Traffic Jams and Plan Roads

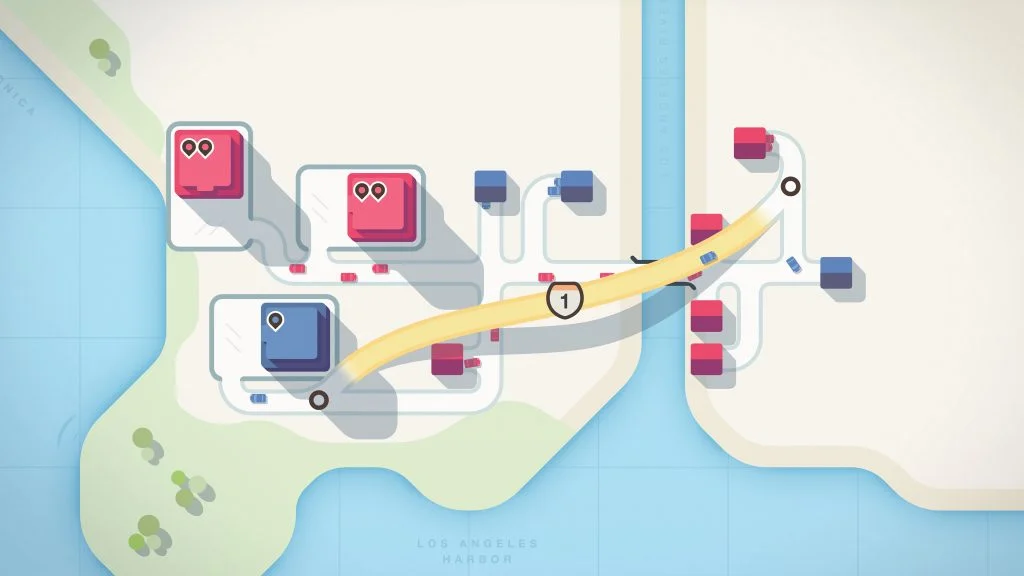
A Mini Motorways road network crossing a river

To fix traffic jams in Mini Motorways, follow a delayed car from its neighbourhood toward its destination. Look for where it actually loses time before adding another road. A long journey and a busy junction need different responses.

Dinosaur Polo Club’s official game page describes drawing and redesigning roads as a city grows. This guide offers a practical review process for those changes. It does not promise a permanent layout: new buildings and changing demand will give you new problems.

Trace one complete journey

Choose a destination that is struggling and inspect the roads feeding it. Then follow one of the relevant neighbourhoods back through the network. A junction can look busy without being the part that limits this particular journey.

I recommend making one change for one stated reason. “This connection shortens the route to that destination” is testable. “More roads should help” is too vague to evaluate. If several destinations are in immediate trouble, address the most urgent one and then check what your change did to the others.

What you seeWhat to investigatePossible response
A long indirect journeyWhether a shorter connection is availableCompare a direct route with your current detour
Cars queue at an intersectionWhich journeys share that junctionReduce unnecessary crossing traffic
A new destination is poorly servedWhich matching neighbourhood can reach itConnect supply deliberately before expanding elsewhere
A road change creates another queueWhat traffic now uses the altered connectionReview the trade-off before adding more complexity
An upgrade seems temptingWhat current problem it would solveChoose it for a visible need

Give a motorway a specific job

A Mini Motorways night map with a motorway crossing the river
Trace the journeys served by a long connection. Its value depends on the traffic it carries, not its visual prominence. Official developer press screenshot. Tap to enlarge.

A motorway should connect places for a reason. Before placing one, identify the trips you expect it to improve and inspect the roads at both ends. Moving cars quickly across the map is less helpful if they immediately join a congested local approach.

For an illustrative practice case, imagine two neighbourhoods feeding destinations across a river through one busy junction. A new connection may separate those journeys. But if the bottleneck is at the destination entrance, shortening the river crossing alone may leave the main problem unresolved. Watch the result rather than assuming the expensive-looking upgrade solved it.

A five-step traffic review

  1. Choose a destination. Identify the place whose service you want to improve.
  2. Trace its connections. Follow the relevant roads and note where different journeys meet.
  3. Name the delay. Distinguish distance, crossing traffic and a difficult approach.
  4. Make a limited change. Use the roads or upgrades available in your selected mode.
  5. Watch the next journeys. Check both the target destination and any neighbours affected by the edit.

Keep the map readable enough to repeat this process. A visually tidy grid is optional; understanding where the traffic goes is the useful part.

Choose junction tools for the junction

A colourful Mini Motorways network with a roundabout and several destinations
A junction tool is part of a larger route. Inspect its approaches and exits as well as the centre. Official developer press screenshot. Tap to enlarge.

The official press kit lists upgrades including roundabouts and motorways. Read the offered choices and relate them to the actual map. A roundabout is not a reason to funnel unrelated traffic through one place, and a new motorway does not remove the need to connect its ends thoughtfully.

My preference is to keep unnecessary through traffic away from a local connection that already has a clear job. That preference changes when a shared route solves a real shortage of roads or crossings. Treat separation as a decision to justify, not a rule that forbids every shared segment.

Practise without chasing a universal blueprint

The developer now offers Creative Mode, alongside the game’s other ways to play. Use the current mode description to decide whether you want an open-ended design session or the pressure of a growing city. Instructions about available editing tools should match the mode you selected.

After a session, keep one observation for the next attempt: which connection helped, and what it cost elsewhere. Our Mini Metro overcrowding guide applies a similar diagnosis to train queues. Mini Motorways is listed for Apple Arcade, Steam and Nintendo Switch on its official page. Screenshots come from the developer’s press kit; older promotional interfaces may differ from your version.

Official promotional screenshot. Copyright remains with the developer.

Wednesday, October 21, 2026

Mini Metro Beginner Guide: Fix Overcrowding and Improve Routes

A Mini Metro network with red, blue and yellow lines connecting shaped stations

When a station starts filling up in Mini Metro, watch what happens when the next train arrives before redrawing the whole network. A full train, a long wait and a missing useful connection are different problems. Diagnose the queue first; then choose an upgrade or route change that addresses it.

Dinosaur Polo Club describes Mini Metro as a growing-city subway design game. You draw lines between stations and adjust the network as demand changes. This guide gives you a practical way to review those changes, rather than a supposedly perfect layout that every new map will outgrow.

Read the station shapes and the waiting passengers

Look at the destination shapes represented in the queue, then trace how a passenger could reach that kind of station. A nearby train is not necessarily a useful train if the network makes the required journey awkward. Follow the route on the actual map instead of judging it only by how tidy the coloured lines look.

I would keep early routes readable enough that I can explain where each one takes passengers. If you cannot trace a journey without losing your place, simplify your plan before adding another complicated branch. Later, when a particular connection has a clear job, a less elegant-looking line can be worthwhile.

What you observeQuestion to askChange to consider
Trains arrive with little roomIs capacity the immediate constraint?Use an available capacity upgrade where the repeated load occurs
The queue waits through a long gapHow much route must a train cover before returning?Review line length and available train allocation
One destination shape dominates the queueIs there a useful connection to that type of station?Improve the journey rather than adding an unrelated line
A new station creates a large detourWhat does the extension do to existing passengers?Compare a revised route with a separate connection if resources permit
Several queues worsen after a changeWhich service did the change remove or slow?Review the trade-off before making another large edit

Practise reading one city

Choose a familiar city while learning the interface. Repeating the broad setting gives you fewer new things to interpret at once, even though growing maps still require fresh decisions. Check the selected play mode as well: the developer lists Classic, Endless, Expert and Creative, so advice about changing a network should match the rules you selected.

Mini Metro city selection interface showing London and neighbouring city cards
Use the city and mode selection deliberately. This official press image shows an earlier interface; the current menu may differ. Official developer press screenshot. Tap to enlarge.

A short queue-diagnosis routine

  1. Choose one troubled station. Identify the queue you want to understand instead of trying to solve every crowded place at once.
  2. Watch a service cycle. Look at the arriving train, the passengers left behind and its onward route. Avoid changing several things before you have seen the result.
  3. Name the constraint. Is the useful service too infrequent, too full, or poorly connected to the required destinations?
  4. Pick an available response. Read the offered upgrade or inspect the route edit. Choose it for that constraint rather than because it is your usual favourite.
  5. Check the neighbouring stations. A fix that moves the queue elsewhere needs another look. Keep track of what service you traded away.

A worked decision without a fixed blueprint

Imagine a practice map where one line has become a long loop and a station’s queue grows between visits. Adding capacity might help if the trains are consistently full. If trains reach that station with space but far too infrequently, the length and allocation of the service deserve attention first.

This is an illustrative comparison, not a promise about an exact number of passengers or trains. Watch what your own network does after the change. A higher score by itself does not tell you which decision improved the service.

A multi-line Mini Metro network with several interchanges and river crossings
Trace an actual passenger journey through the network. A neat diagram can still contain an inconvenient connection. Official developer press screenshot. Tap to enlarge.

Choose the next upgrade for a reason

Before accepting an upgrade, finish this sentence: “This helps because the current problem is…” If the answer is only “I always choose it,” look at the queues again. I prefer an improvement that solves a visible problem over one that depends on a hoped-for future station; that preference changes when the current service is stable and expansion is the real constraint.

After a run, save one observation for the next attempt. “The long extension slowed the earlier stops” is useful. “Everything went wrong” is too broad to test. For another game where focused decisions make a short session easier to review, see our Peglin beginner guide. Images are supplied by the official Mini Metro press kit.

Official promotional screenshot. Copyright remains with the developer.

Tuesday, October 20, 2026

Brotato Beginner Guide: Choose Weapons and Shop Upgrades

Brotato player and enemies in an official arena gameplay screenshot

In Brotato, decide what your current build is missing before spending in the shop. Are enemies surviving long enough to surround you, or are you taking hits despite clearing them? Those problems call for different purchases. A rare-looking item is not useful simply because it is offered.

Blobfish’s official game description introduces a top-down arena shooter built around characters, weapons and items. Weapons fire automatically by default, with manual aiming available. This guide focuses on reading your build and making a clear next purchase; it does not promise a particular winning loadout or current numerical balance.

Read the character before choosing weapons

I recommend starting with a character whose bonuses and penalties you can explain in one sentence. That makes it easier to recognise an unsuitable offer. If you already enjoy a specialised character, keep using it, but let its actual description override generic beginner advice.

Check the weapon’s displayed damage scaling and its other properties. Do not assume a familiar-looking weapon benefits from every damage statistic. If two purchases improve unrelated parts of your equipment, ask whether you are splitting a limited budget across too many jobs.

What happened in the wave?What to inspectA sensible shopping question
Enemies stayed alive and crowded youWeapon damage, attack rate and whether your bonuses applyWhich available purchase improves the weapons I am actually using?
You defeated enemies but lost health repeatedlyMovement choices and available defensive or recovery optionsCan I improve survival without making the damage problem worse?
An exciting item weakened another statisticThe full benefit and penaltyIs the downside affordable for this character?
You kept paying to change the offersRemaining materials and useful purchases already visibleAm I searching for a need or chasing a favourite item?
You cannot explain why a weapon is equippedIts role and scalingDoes it solve a current problem or merely fill a slot?

Use the next wave as a short test

  1. Choose one problem. Describe the last wave in observable terms: enemies accumulated, movement became restricted, or health fell quickly.
  2. Read the entire offer. Include penalties and conditions. Compare it with the character description and your equipped weapons.
  3. Make a purchase with a reason. You should be able to say what improvement you expect before accepting it.
  4. Watch the next wave. Notice whether the identified problem is smaller. A successful wave does not establish that every purchase was good.
  5. Adjust the diagnosis. If damage looks adequate but collisions continue, consider movement and survival rather than buying more of the same statistic automatically.
Brotato promotional screenshot showing a character near several deployed structures
Different builds can place different demands on movement and positioning. This is an older official press screenshot; its HUD values are not current build advice. Tap the image to inspect the full screenshot.

Keep a route out of the crowd

While moving, look ahead for open space instead of staring only at the closest enemy. A tempting pickup is a poor immediate target if reaching it traps you. Give yourself permission to leave it when the route is closing.

My preference for a learning run is to keep the equipment plan simple enough that I can watch movement. Once the basic pattern feels manageable, experiment with more specialised combinations. Trying to learn a new character, unfamiliar weapons and an aggressive collection route together makes it harder to identify what went wrong.

Brotato promotional arena screenshot with enemies closing around the player
Look for an available movement route before the crowd closes it. Official press image; release balance and interface details may differ. Tap the image to inspect the full screenshot.

A worked shopping decision

Consider this invented practice scenario: your weapons remove nearby enemies comfortably, but you repeatedly run through a cluster to collect materials and lose health. The next decision is not automatically “buy more damage.” First change that route. Then compare an available survival option with the items that improve damage, reading the trade-offs on each card.

If enemies instead remain alive around every exit, the diagnosis changes. Check whether your purchased bonuses apply to your weapons and whether the next offer improves their output. These are conditional decisions, not a fixed shopping list.

Make the next attempt easier to understand

At the end, write one sentence about the failure and one change to try. “Avoid crossing through the densest group for pickups” is testable. “Get luckier” gives you nothing to practise. Keep the character stable for the comparison if you want to isolate that change.

See the Arcade Games catalogue for other short-session guides. The screenshots come from Blobfish’s official press materials. Use the current in-game descriptions for exact statistics, item costs and character restrictions.

For another game where each purchase needs a reason, see our Luck be a Landlord beginner symbol guide.

Official brotato promotional screenshot. Copyright remains with the game developer.

Monday, October 19, 2026

Luck be a Landlord Beginner Guide: Choose Symbols for Rent

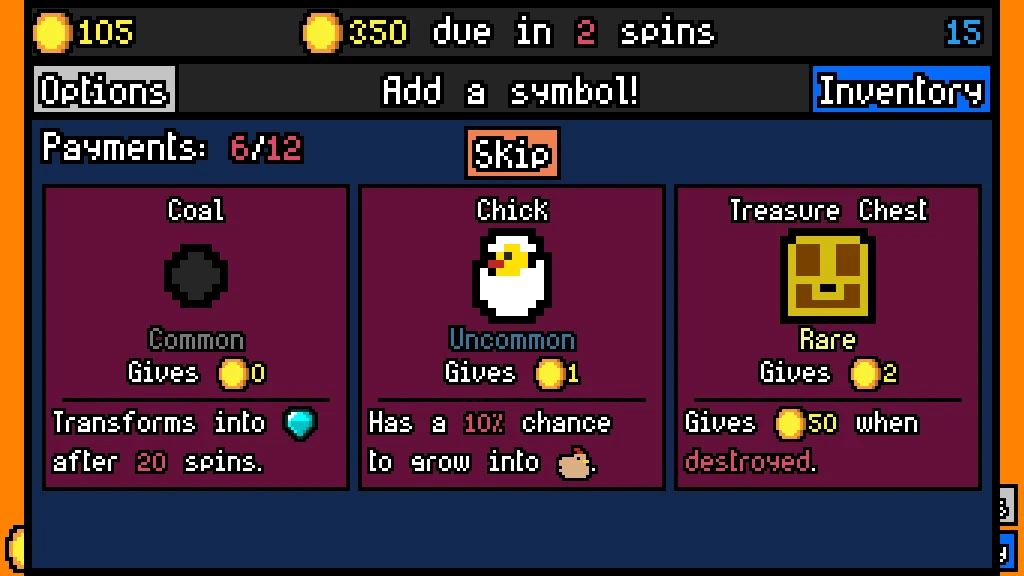
Official Luck be a Landlord screenshot offering Coal, Chick and Treasure Chest symbols beside the Skip button.

In Luck be a Landlord, a promising symbol can still be a poor choice for the rent payment immediately ahead. Before adding it, check what it earns now, what it needs to work and how long its payoff takes. This beginner guide provides a symbol-choice checklist and a simple way to review a failed run without assuming that every loss came from bad luck.

The game is a roguelike deckbuilder built around a fictional rent-paying slot machine. The developer confirms that it contains no real-money gambling or microtransactions in the official press kit. Its changing symbol and item offers create different combinations from run to run; their individual effects and interactions are described on the official Steam page.

My recommendation is to judge a new symbol against the next rent payment before imagining a future combination. I would give a delayed reward more room once the immediate payment is covered; when it is not, the missing partner or extra spins are a cost to account for now.

Read the rent display before choosing a symbol

Start with three numbers on your screen: current coins, rent due and spins remaining. A rough target is the unpaid rent divided by remaining spins. This is a planning aid, not a prediction of what your next spin will earn. Random outcomes and changing interactions mean an average requirement cannot guarantee success.

For a hypothetical example, suppose you have 80 coins, owe 140 and have three spins left. You need another 60 coins, or 20 per remaining spin on average. A choice with a delayed reward needs to be judged against that immediate gap. If you already hold enough coins for the payment, you have more room to consider a longer-term combination.

When no spins remain, stop using the calculation and compare your balance directly with the payment. Do not divide by zero or treat the next rent period's opportunities as money you have already earned.

Compare effects, not just rarity

The press screenshot above illustrates a useful decision. It offers symbols with different kinds of payoff: a delayed transformation, a chance to grow and a reward that depends on destruction. The precise values shown belong to that official screenshot; check the descriptions in your installed version before choosing.

Ask what would have to happen for each offer to help. A conditional reward deserves a follow-up question: do you already have an effect that can meet its condition? A symbol that might work with a future offer is a speculative choice. Write down that missing piece instead of counting the whole imagined combination as current income.

Questions to ask before accepting a symbol
CheckLook forDecision it informs
Immediate outputThe symbol's base payout and current effectsWhether it can help with the next payment.
Required partnerA named symbol, item or event in its descriptionWhether the interaction is already supported.
DelayA spin count, transformation or growth conditionWhether the reward can arrive soon enough.
Trigger wordingTerms such as adjacent, destroyed or chanceWhat must happen before the bonus applies.
Existing collectionYour inventory and item descriptionsWhich offer fits what you actually own.
SkipThe available Skip choiceWhether any offer has a clear purpose in this run.

Use a short routine between spins

  1. Check the rent gap and remaining spins.
  2. Open your inventory if you cannot remember the relevant symbols or items.
  3. Read the full wording of the most promising offer, including its trigger.
  4. Choose it for a stated reason, or consider skipping when none of the offers supports your plan.
  5. Watch the next result and identify whether the expected interaction occurred.

Keep the reason specific: “works with an item I already own” is more useful than “looks strong.” You do not need to calculate every possible outcome. The routine is meant to catch missed conditions and expensive delays before you commit.

Review one decision after a failed payment

Record the payment you missed, how far short you were and one earlier selection you would reconsider. Separate an interaction that never became active from one that was active but paid inconsistently. Those suggest different changes: the first needs better selection evidence, while the second may need a larger income margin.

Use our run tracker to retain that one useful observation. For a short next session, the practice planner can give you a narrow goal such as reading every trigger before accepting a symbol. A single result will not establish a best build; several recorded decisions can show which conditions you repeatedly overlook.

Official Luck be a Landlord press screenshot of a symbol choice. Values shown are from the supplied press image; check your installed game. Image: TrampolineTales.

Sunday, October 18, 2026

Peglin Beginner Guide: Plan Shots and Choose Upgrades

Metal ball between cream flippers on a bright pastel pinball table.

In Peglin, pause before each shot to choose what the orb needs to accomplish. You might want immediate damage, a route through a dense patch of pegs or access to a useful special peg. Picking that purpose first makes it easier to understand why a shot worked and what to change after a poor one.

Red Nexus Games describes Peglin as a pachinko-style roguelike: hitting more pegs builds damage, orbs and relics have special effects, and defeat ends the run. Its official Steam page also identifies critical hits, refreshes and bombs as tools to use deliberately. These beginner tips focus on those decisions without prescribing a fixed build.

Read the orb before aiming

Check the current orb's description and damage information before choosing a path. A route that suited the previous orb may do little for this one. If an effect depends on a condition, ask whether you can reasonably trigger it on the board in front of you.

Compare two possible openings. One might hit several nearby pegs reliably; another might head towards a special peg but depend on a difficult bounce. Look at the first contact and the likely direction afterwards. You do not need to predict every collision to identify a shot that starts by dropping through an empty gap.

After firing, watch where the route stopped working. Was the first angle wrong, was the useful part of the board already sparse, or did you expect an effect that the orb did not have? Give the mistake a name before the next shot.

A pre-shot decision table

Choose a purpose for the current orb
What you seeWhat to checkPossible priority
Many reachable pegsFirst bounce and gaps below itA path with several likely contacts
A sparse part of the boardReachable refresh option and current orb effectA route that helps restore useful contacts
A reachable critical pegThe orb's critical damage or special conditionCritical access when it benefits this orb
A bomb near your routeWhether the route still serves the current fightInclude the bomb if the detour is worthwhile
An unfamiliar orbIts full descriptionTest one effect you can observe clearly
A risky angled shotThe simpler alternativePrefer the route whose first contacts you understand

Choose upgrades for a problem you have

When an upgrade or a new orb is available, name the weakness you want it to address. Perhaps your current choices depend too much on awkward angles, or a useful effect rarely activates. Read what the offered option changes, then judge it against that specific weakness.

Do the same with relics. An attractive description is only part of the decision; you also need to know which part of your current run benefits. If you cannot explain the connection in a sentence, compare the other options before committing. This is a learning habit, not a claim that unfamiliar choices are always bad.

A hypothetical example: if an upgrade improves an orb you already understand and use effectively, it is easier to evaluate than a new effect whose conditions you have not learned. You can still choose the unfamiliar effect for practice. Record that choice as an experiment so a failed run tells you something useful.

Reassess as the map changes

Peglin's official description says each run has a new map with different encounters and rewards. Avoid planning around a sequence you saw in a previous attempt. At a route choice, consider your current health, the options displayed and whether your recent fights suggest you can handle more risk.

For your first attempts, choose one thing to practise rather than changing everything at once. Try reading each orb before firing for a full run, then focus on recognising weak opening angles in the next. Our short practice-session planner can help you keep that goal small enough to finish.

Keep a useful record after defeat

  1. Write down where the run ended.
  2. Describe one recurring problem with your shots or choices.
  3. Note an orb or relic interaction you understood better.
  4. Choose one adjustment for the next attempt.

Keep those notes beside your run tracker. Record the mode and any settings that change the challenge before comparing attempts. A longer run is useful evidence, but so is identifying why a particular shot repeatedly leaves you with little damage. On the next attempt, test that observation before adopting another unfamiliar strategy.

Original editorial pinball illustration representing bounce-based play; not a Peglin screenshot. Peglin uses pachinko-style gameplay.

Saturday, October 17, 2026

Balatro Shop Guide: How to Choose Upgrades for Your Deck

Official Balatro key art with the game logo, an ace of spades and Joker cards against a red and blue background.

A tempting Joker can send a Balatro run in a new direction. Before buying it, ask a smaller question: what would make this card useful with the deck you have now? This shop checklist helps you compare an immediate improvement with a plan that still needs several things to go right.

Start with the hand you can actually make

Balatro combines poker hands with Joker effects to earn enough chips to beat Blinds. Its tools include Tarot cards that enhance playing cards, Planet cards that level up hand types, and Vouchers that provide benefits for the current run. Those roles are described in the official Steam listing.

A useful buying decision connects one of those tools to a specific problem. Perhaps your usual hand needs more scoring power, or a promising Joker depends on cards you rarely draw. Write down that problem before judging the shop. Otherwise, the most interesting description can become the plan simply because it caught your attention first.

Five questions to ask in the shop

This is a decision worksheet, not a ranking of cards. Read the complete text of each offered item and fill in only the rows that matter. The game state and the actual card wording take priority over any general recommendation.

Connect a possible purchase to your current run
Purchase questionLook atWrite a concrete answer
What does it need?The full condition on the cardThe hand, cards or situation that activates it
Can I use it now?Your present deck and existing effectsWhat already supports that condition
What problem does it solve?Your most recent difficult BlindScoring, consistency or another stated need
What else would it need?Missing cards, upgrades or conditionsEach dependency that is still uncertain
What does it cost me?The displayed price and any replacement decisionMoney left and the benefit you would give up

Compare a working improvement with a possible one

Consider this invented situation: you have been making pairs regularly, and the shop offers a way to improve that hand type. A different offer looks attractive but depends on a combination you have not been making reliably. The first has an obvious use in your present run. The second needs you to explain how the missing support will arrive.

That does not make the second purchase wrong. It makes the uncertainty visible. “This might help later” is a weaker reason than “my deck already supplies the condition, and this effect improves the hand I keep playing.” If your current approach is failing, a change may be worth considering; write down what the change is meant to fix.

Do not assign imaginary future value to an item by assuming the next shop will supply its perfect partner. Evaluate that future partner as a possibility. This keeps a speculative build from quietly turning into a promise in your notes.

Use a short decision loop

  1. Name the current scoring plan. Use one sentence describing the hand or condition your run is leaning on. If you cannot describe it yet, note that you are still exploring.
  2. Read the offer completely. Include conditions, limits and any replacement you would have to make. Similar-looking benefits can serve different purposes.
  3. Check the worksheet. Compare the most relevant purchase with keeping your money. You do not need to fill every row for every item.
  4. Record your reason before continuing. One line is enough: “Improve the hand I already make” or “Try this condition because my deck supports it.”
  5. Review after playing. Did the expected condition occur? Did the purchase solve the problem you named? Keep those answers separate.

What to keep from a lost run

One loss does not prove that a purchase was bad, just as one unusually successful hand does not prove it was reliable. Record the deck and relevant conditions alongside the result. Our high-score comparison tracker explains why comparisons need that context.

For your next session, pick one question from the notes. You might track whether a Joker's condition occurred as often as you expected, or whether you kept buying toward a hand you rarely made. Use the short-session practice planner if you want room for a brief review between attempts. The useful record is the decision and its result, not a list of every card you saw.

Official Balatro key art. Image: LocalThunk / Playstack.